
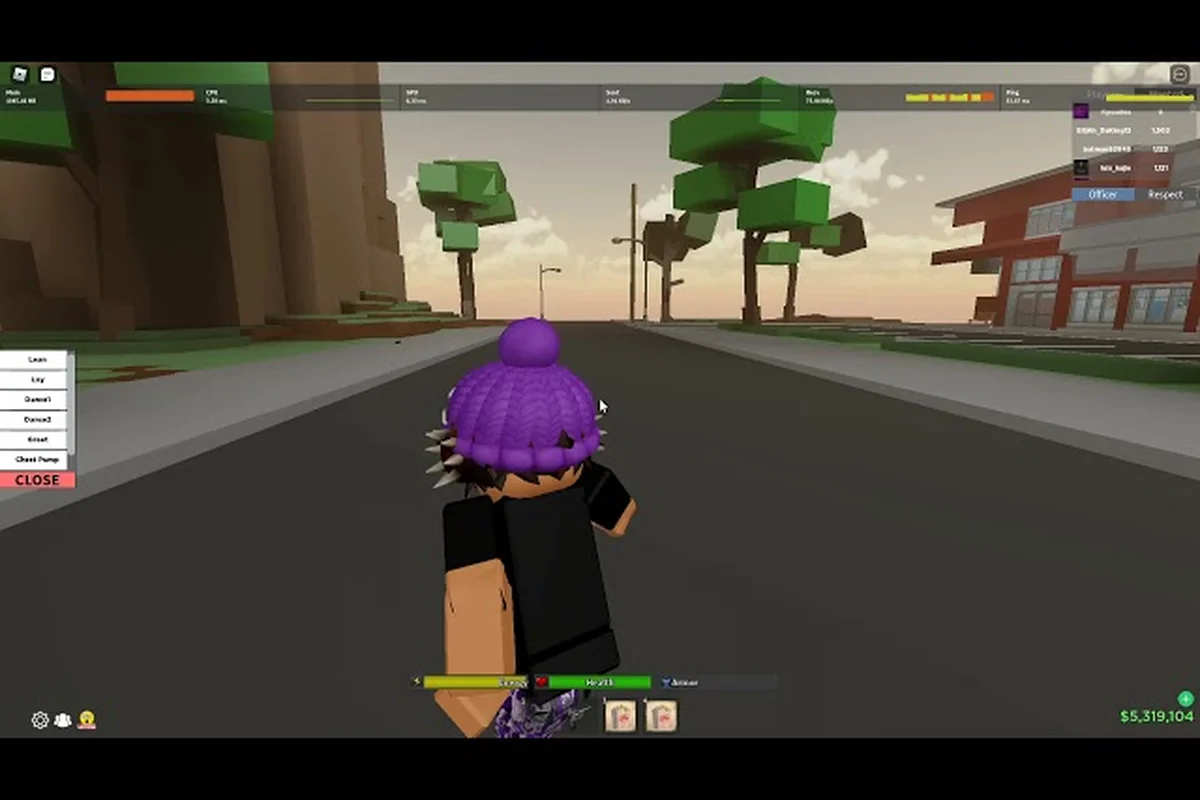
Running from a chaser in Da Hood is less about sprinting in a straight line and more about layering movement tech so that every turn, spin, and counter-shot breaks the pursuer's lock. This breakdown covers jukes, spins, recoil control, and flick shots as a single connected skill set, because surviving a chase in Da Hood is decided by what you do between shots, not by raw speed.
Understanding each piece of that chain matters because most players who lose chases are not losing on gunplay alone. They are getting caught the moment they start running because their movement tells the chaser exactly where they are going. Building a fluent escape plan means mastering juke timing, learning when to spin, and counter-pressuring with well-placed flick shots when the chaser closes the gap.
Why Movement Tech Decides Most Chases in Da Hood
Da Hood's gunplay is responsive, but its hit registration still leans on crosshair placement and target prediction. A chaser who can read your line will hit shots far easier than one forced to guess, which is exactly why movement tech such as jukes, spins, and strafes matters so much when you are the one running away. Every fake, every sharp cut, and every counter flick forces the chaser to re-acquire, costing them the cleanest shot window. According to community data shared across the official Roblox game page, most chases end within the first three seconds once a chaser establishes tracking, which means the opening movement burst is the single highest-value moment in any escape.
Movement also stacks with weapon choice. A heavy revolver and a lightweight pistol produce completely different escape rhythms because their recoil pulls your crosshair in different directions and pulls it for different lengths of time. Chasers will pick weapons that complement their aim style, so a runner who only knows one movement pattern is essentially playing into the chaser's chosen loadout. Layering jukes with smart spins and timed counter shots turns the chase into a contest of improvisation instead of a contest of pure aim.
The Three Phases of a Da Hood Chase
Almost every Da Hood chase breaks into three predictable phases — the opening break, the mid-chase scramble, and the counter-press window — and each one punishes a different movement mistake. Reading the phase in real time matters because the runner who keeps the same sprint-and-juke pattern through all three gets clipped by a recoil-controlled flick shot the moment the chaser over-commits; rotating between sharp jukes, spin direction switches, and quick repositions is what actually buys distance. Recognizing which phase you are in is the difference between honest reactions and panic mashing.
| Phase | What Happens | Best Movement Tool | Common Mistake |
|---|---|---|---|
| Opening Break | Runner turns first, chaser locks on | Sharp juke + strafe | Sprinting in a straight line |
| Mid-Chase Scramble | Chaser has line of sight, runner weaves | Spin + direction switch | Predictable zig-zag |
| Counter-Press Window | Chaser over-commits on a shot | Flick shot + reposition | Standing still to aim |
Movement Tech Value at a Glance
Different movement tools contribute different things to a chase, and a smart runner blends them instead of relying on one. In practice, top Da Hood players layer a Juke to snap a pursuer's aim off-axis, immediately into a Spin to reset close-range tracking, and only then layer recoil control so the counter-shot lands while still strafing — sequencing matters more than any single tech. The table below captures the practical weight each tool carries based on community testing and high-rank clips, so you can see which combination actually fits your loadout and the chaser type you're most often matched against.
| Tech | Primary Use | Skill Ceiling | Best Against |
|---|---|---|---|
| Juke | Breaking locks at medium range | Medium | Pistol chasers |
| Spin | Resetting tracking at close range | High | Shotgun chasers |
| Strafe | Holding angles during a retreat | Low | Sniper chasers |
| Flick Shot | Punishing over-commits | High | Any chaser mid-swing |
| Recoil Control | Staying on target after firing | Medium | Long chases |
Building a Sharper Da Hood Juke Tutorial Foundation
A proper Da Hood juke tutorial starts with the footwork, not the click timing. Jukes work because they break the chaser's prediction cycle, and the only way to do that consistently is to commit to a sharp turn at full sprint instead of the lazy 45-degree drift most beginners use. The stronger your angle, the harder it is for the chaser to swing their crosshair fast enough to track you. Once you start cutting sharper angles, the chase opens up because the chaser is forced to choose between predicting your next fake and committing to the shot you just showed them.
Timing matters just as much as angle. A juke thrown out the instant you round a corner is far more effective than one thrown mid-line, because the chaser is already reacting to your break and has to redirect their swing a second time. Layer two jukes in a row with a short delay and you have a near-unreadable pattern that turns the chase into a coin flip for the chaser. If you are still learning the basics of when to commit to a corner, the starting out guide covers sprint timing and early movement fundamentals that pair well with advanced jukes.
Juke Inputs at a Glance
There are a few reliable input patterns that show up again and again in chase clips, and each one solves a different problem. Learning them as a small set of patterns keeps your muscle memory clean instead of forcing you to invent a new move every chase.
| Input Pattern | What It Mimics | When to Use It |
|---|---|---|
| A then D tap | A-D strafing | Mid-chase resets |
| Quick crouch + sprint | Headshot line break | Right before a corner |
| 90° cut + reverse | Direction reversal | When chaser is close |
| Crouch + Juke | Bait shot | After a missed shot |
Why Sharp Cuts Beat Wide Sweeps
Wide sweep turns look flashy but they cost you a full second of straight-line travel, which is a lifetime against a chaser who is already tracking. Sharp cuts keep your movement compact, meaning the chaser has to swing a much larger angle to follow you. That added swing is the difference between a clean miss for them and a clean counter-shot for you, because the larger the angle, the more their crosshair overshoots your new line. Once you internalize the idea that a tight turn is faster in chase terms, every juke will start to feel sharper without any extra effort.
Learning How to Spin in Da Hood Without Losing Control
Knowing how to spin in Da Hood cleanly is the bridge between breaking a chaser's tracking and finishing the fight, because the spin itself is the moment you reset the geometry of the chase. A well-timed spin takes the chaser's attention off your escape line and puts it on the question of which direction you are going to commit to once the spin ends. Done badly, it leaves you stationary and exposed. Done well, it forces the chaser to choose between their current line of fire and a new line they cannot yet predict.
Spin timing should almost always be tied to a corner or an obstacle, because the spin itself is a stalling tool. Without something to spin around, you are simply wasting the chaser's time briefly while also wasting your own. The cleanest spins happen when the chaser is about to round the same corner, because both players are now committing to the same geometry and the spin decides who walks out first. For a deeper look at how spins interact with melee pressure, the melee fights guide shows how the same spin timing applies when opponents close the distance with fists instead of guns.
Spin Timing Versus Chaser Range
Spin behavior in Da Hood should scale inversely with chaser proximity because each range grants a different recovery window, and misjudging that window is the difference between landing a clean counter and getting punished mid-rotation. Point-blank pressure forces a half-spin into an immediate counter since any extra rotation locks your hitbox in place too long, while long-range chases buy enough distance to commit a full spin, reposition, and chain a flick shot off the chase angle. The table below maps these ranges to the precise spin length, follow-up action, and ideal counter that keeps your recoil control intact and your movement unpredictable to the chaser.
| Chaser Range | Spin Length | Follow-Up |
|---|---|---|
| Point Blank | Half-spin, immediate counter | Flick shot |
| Close | Three-quarter spin, then break | Juke |
| Medium | Full spin, then crouch | Strafe |
| Long | Spin, reposition, repeat | Flick shot |
Common Spin Mistakes to Avoid
Spins go wrong most often when players use them as a panic button instead of a deliberate tool. The first sign of trouble is spinning without checking distance, which leaves you stationary against a shotgun chaser who only needs one clean shot. The second is spinning in the same direction every time, which lets attentive chasers pre-aim the exit line. The third is failing to commit after the spin, because hesitation gives the chaser a free shot at a player who has paused to think instead of move.
A more disciplined approach treats the spin like a reset button between two movement bursts, not like a defensive skill. That mindset keeps the spin short, deliberate, and always followed by a direction change. Once you adopt that framing, the chaser can no longer read your spin as a stop signal, and the chase becomes a real back-and-forth instead of a one-sided catch.
Da Hood Recoil Control for Runners Who Need to Fight Back
Da Hood recoil control is often treated as a shooting skill, but in a chase it doubles as a survival skill because every clean counter-shot forces the chaser to think twice about their next push. The reason recoil control matters so much in a chase is that you are almost always firing on the move, sometimes while strafing, sometimes immediately after a juke. Holding a steady line of fire under those conditions is what separates runners who buy themselves time and runners who simply run in a straight line hoping the chaser misses.
The core idea is to pull the mouse in the direction opposite the recoil pull immediately after each shot, so that the next shot lands roughly where the first one did. In Da Hood, that means learning how each weapon's pattern feels at sprint speed, crouch speed, and while airborne, because the recoil behavior shifts subtly across those states. A clean counter-shot sequence usually looks like: break tracking with a juke, plant for a fraction of a second, fire a small burst with active recoil correction, then move again before the chaser re-acquires.
Recoil Patterns by Weapon Class
Different weapon families produce different recoil shapes, and your counter-shot timing has to flex with them. A revolver's hard upward + side kick demands you wait 3-4 frames before flicking back, while a shotgun's single heavy kick leaves a longer 4-5 frame counter window where landing a headshot is realistic if you've practiced DA Hood recoil control on a wall. Pistols and SMGs punish impatient jukes during a DA Hood running away chase because their 1-3 frame counter windows close almost instantly, so flick shot muscle memory matters more than raw aim. The table below summarizes the practical recoil feel for the most common chase weapons, based on community testing across custom recoil-sandbox lobbies and recorded park clips.
| Weapon Class | Recoil Direction | Pull Strength | Counter Window |
|---|---|---|---|
| Pistol | Slight upward | Low | 1-2 frames |
| Revolver | Strong upward + side | High | 3-4 frames |
| SMG | Steady upward | Medium | 2-3 frames |
| Shotgun | Single heavy kick | High | 4-5 frames |
| Rifle | Slow upward drift | Medium | 2-3 frames |
Recoil Drills That Actually Work in Chases
Practicing recoil control in an empty server feels different from practicing it in a real chase, so it helps to run drills that simulate chase conditions. One simple drill is to sprint in a circle around a target dummy while firing small bursts, focusing on keeping the crosshair on the dummy's head through the recoil pull. A second drill pairs a juke with a two-shot burst, so you train the recoil correction to happen mid-movement instead of after you stop.
A third drill worth running is the crouch-and-counter drill, where you crouch to break the chaser's line, fire one controlled shot with active recoil correction, then sprint away before they recover. These drills together train the three recoil situations you will face in a chase: firing on the move, firing after a juke, and firing from a crouch reset. Once those three feel natural, your counter-shots will start to land even when your feet are not fully planted.
Da Hood Flick Shots and the Counter-Press Window
Da Hood flick shots are the finishing move of any clean escape, because they punish chasers who over-commit to a swing. The counter-press window opens whenever the chaser is mid-swing, mid-reload, or just out of position, and it closes almost immediately once they re-acquire you. Reading that window is what separates runners who escape cleanly from runners who just delay the inevitable.
Flick shots differ from tracking shots because they do not assume the target is moving predictably. Instead, they assume the chaser is approximately where your crosshair already is, and the flick adds the small correction needed to land the headshot. In a chase, that means placing your crosshair roughly where the chaser's head will be the moment they finish their swing, and then committing to the flick the instant they over-extend.
When to Commit to a Flick Shot
A flick shot is only worth taking if the chaser has given you a real opening, and a smart runner learns to spot those openings quickly. The table below lists the most common flick shot opportunities during chases, based on player reports and high-rank clips.
| Opening | Why It Works | Risk If You Miss |
|---|---|---|
| Chaser mid-swing | Crosshair is off target | Chaser lands shot |
| Chaser reloading | No counter-fire | None |
| Chaser past a corner | Wrong line of fire | Lose distance |
| Chaser strafing predictably | Easier prediction | Chaser switches pattern |
| Chaser low on stamina | Slow follow-up | None |
Building Flick Shot Confidence in Real Chases
Flick shot confidence comes from reading the same patterns over and over, not from flicking faster. The first step is to slow your flicks down until you can land them consistently on stationary targets, because a slow clean flick is more useful in a chase than a fast sloppy one. The second step is to add a small strafing input between flicks, so your muscle memory learns to flick on the move. The third step is to combine the flick with a juke, so you are practicing the exact counter-press pattern that closes most chases.
Once those three feel natural, your flick shots will start to land in real chases because the input pattern is identical to what you trained. Chasers who try to brute-force a chase with raw tracking will start to lose trades to runners who flick the moment they over-commit, which is exactly the shift in momentum that turns a runner into the aggressor.
Stacking Movement Tech Into a Single Escape Plan
Each movement tool on its own is useful, but the real skill is stacking them so the chaser can never settle on a single read. The cleanest escape plan looks like a sequence of inputs rather than a single move, with each input answering a specific question the chaser is about to ask. If you treat the chase as a layered conversation, every tool has a place and the chaser spends the whole chase guessing.
A simple stacking pattern that works at most ranks is juke → spin → flick → reposition, repeated as needed. The juke breaks the chaser's initial lock, the spin resets the geometry, the flick punishes any over-commit, and the reposition starts the next cycle with the chaser already behind. The exact timing of each step shifts based on the chaser's weapon and aggression, but the shape of the pattern stays the same.
Movement Stack Cheat Sheet
| Step | Tool | Purpose | Time Window |
|---|---|---|---|
| 1 | Juke | Break initial lock | 0.0-0.5s |
| 2 | Spin | Reset geometry | 0.5-1.0s |
| 3 | Flick | Punish over-commit | 1.0-1.5s |
| 4 | Reposition | Start new cycle | 1.5s+ |
Reading the Chaser During the Stack
The stack only works if you are reading the chaser between steps, because each step's timing depends on what they are doing. If the chaser is using a shotgun, you want to extend the spin and skip the flick, because getting close enough for a flick is exactly what they want. If the chaser is using a rifle, you want to compress the stack so you spend less time in their optimal range. If the chaser is using a pistol, the full stack works well because pistols reward clean flick trades over sustained tracking.
Reading the chaser also means watching their stamina and their movement commitment. A chaser who is burning stamina on a wide swing is a chaser who cannot correct quickly, which is your cue to commit to a flick. A chaser who is conserving stamina and keeping their swings short is a chaser who is reading you, which is your cue to throw a sharper juke and break the pattern entirely.
Common Mistakes That End Chases Early
Most chases end because the runner made a small mistake early, not because the chaser outplayed them in the final seconds. The first mistake is sprinting in a straight line, which gives the chaser a free tracking line. The second mistake is failing to crouch before a corner, which lets the chaser pre-aim the exit. The third mistake is firing while still in motion, which produces wild shots and tells the chaser exactly where you are. The fourth mistake is hesitating at the end of a juke, which turns a clean break into a half-break the chaser can re-acquire.
A fifth mistake worth flagging is the panic spin, where the runner spins without checking distance or cover. Panic spins are easy to read because they happen at predictable moments, and experienced chasers will bait them on purpose. Replacing a panic spin with a deliberate half-spin and a counter-shot turns the chaser's bait into your opening, which is the kind of mental shift that pushes a runner from surviving chases to winning them.
Mistake-to-Fix Cheat Sheet
| Mistake | What It Looks Like | Quick Fix |
|---|---|---|
| Straight sprint | No direction change | Add 90° cut |
| Standing to aim | Pausing mid-chase | Fire on the move |
| Panic spin | Full spin in open area | Half-spin near cover |
| Predictable zig-zag | Same rhythm every time | Vary timing |
| Late crouch | Crouching after corner | Crouch before corner |
Building Chasing Defense Into Your Loadout
Movement tech matters most when paired with a loadout that supports the kind of chases you take. A weapon with high recoil and slow follow-up shots is harder to control during a counter-press, while a weapon with low recoil and fast follow-up lets you stack flicks without losing accuracy. Ammo count matters as well, because a runner who runs dry mid-chase is forced to break the stack and re-engage, which is exactly the moment a chaser needs to close the gap.
Perks and stamina tools round out the loadout, because a runner with low stamina will feel every juke twice as much as a runner with full stamina. Choosing loadout pieces that complement your movement style is what lets you run the full stack consistently instead of only running it when conditions are perfect.
Loadout Pieces That Support Clean Escapes
| Loadout Slot | Best for Runners | Why It Helps |
|---|---|---|
| Primary | Low-recoil pistol or SMG | Easier counter-flicks |
| Secondary | High-damage backup | Punishes chasers who close in |
| Stamina Boost | Yes | Sharper jukes across longer chases |
| Ammo Pack | Yes | Sustained counter-press |
| Movement Perk | Yes | Faster direction changes |
Pairing Loadout With Movement Style
If you favor sharp jukes and quick spins, a lightweight pistol pairs better than a heavy revolver because it lets you keep the stack tight. If you favor counter-press flick shots, an SMG gives you the burst capacity to punish chasers repeatedly before they recover. The pairing is not fixed, but it should reflect which movement tool you rely on most, because mismatched loadouts force you to slow your stack down to match the weapon's rhythm. Players who are still building out their core loadout choices can find helpful context in the beginner guide, which covers weapon basics and early cash flow.
Putting It All Together in a Real Chase
Once every tool is familiar, the best way to test them is in a real chase rather than another drill. A clean real-chase sequence starts with a sharp juke the moment the chaser locks on, a half-spin as you reach a corner, a controlled flick the moment the chaser over-commits, and a reposition that starts the next cycle. The first chase you run with the full stack will feel slow, because your brain is running the steps instead of feeling them. The tenth chase will feel smoother. The fiftieth chase will feel automatic.
A useful self-check after each chase is to ask which step in the stack broke first, because that step is the one to drill next. If the juke broke first, you need sharper turns. If the spin broke first, you need better distance awareness. If the flick broke first, you need more recoil control practice. If the reposition broke first, you need to commit harder to the next cycle instead of hesitating. The chase itself is the best teacher once you start reading your own stacks.
Quick Reference: Movement Stack by Situation
| Situation | Stack to Use | Why |
|---|---|---|
| Open street chase | Juke → Spin → Flick | Cover is limited |
| Alley chase | Juke → Strafe → Flick | Corners are tight |
| Multi-corner chase | Spin → Juke → Flick | Geometry resets fast |
| Stair chase | Strafe → Juke → Flick | Verticality helps |
| Open field chase | Flick → Juke → Reposition | Distance is your friend |
Frequently Asked Questions
What is the single most important movement tool for Da Hood running away?
The sharp juke is the most important tool because it breaks the chaser's tracking line at the start of every chase, and almost every other tool depends on that first break landing. A clean 90° juke forces the chaser to swing their crosshair, which buys you the time you need to layer in spins and counter-shots.
How do I practice spins without losing track of the chaser?
Practice spins by training the half-spin first, because it resets your facing without forcing you to commit to a full rotation. Once the half-spin feels natural, add a quick flick at the end of the spin so your counter-press happens automatically. The key is to always tie the spin to a cover point, because a spin in the open wastes the reset.
When should I take a flick shot during a chase?
The best time to flick is when the chaser has over-committed to a swing or is mid-reload, because their crosshair is off your line and they cannot counter-fire. Avoid flicking while the chaser is already tracking you, because the flick will not land and you will lose the reposition window. Patience is what makes a flick shot reliable in real chases.
Can recoil control help even if I am running a low-recoil weapon?
Yes, because even low-recoil weapons drift at sprint speed, and a chaser who notices the drift will pre-aim your correction line. Practicing recoil control on a low-recoil weapon builds habits that transfer directly to higher-recoil weapons, which means your counter-shots will stay accurate as you upgrade your loadout over time.
How do I know when a chase is lost and I should reset the fight?
A chase is usually lost when the chaser is within shotgun range, has full stamina, and is still tracking you cleanly. Once all three of those are true, the cleanest reset is to break line of sight around a corner and re-engage from a new angle instead of continuing the chase. A reset costs you distance but gives you back control of the geometry, which is what most lost chases were missing in the first place.