
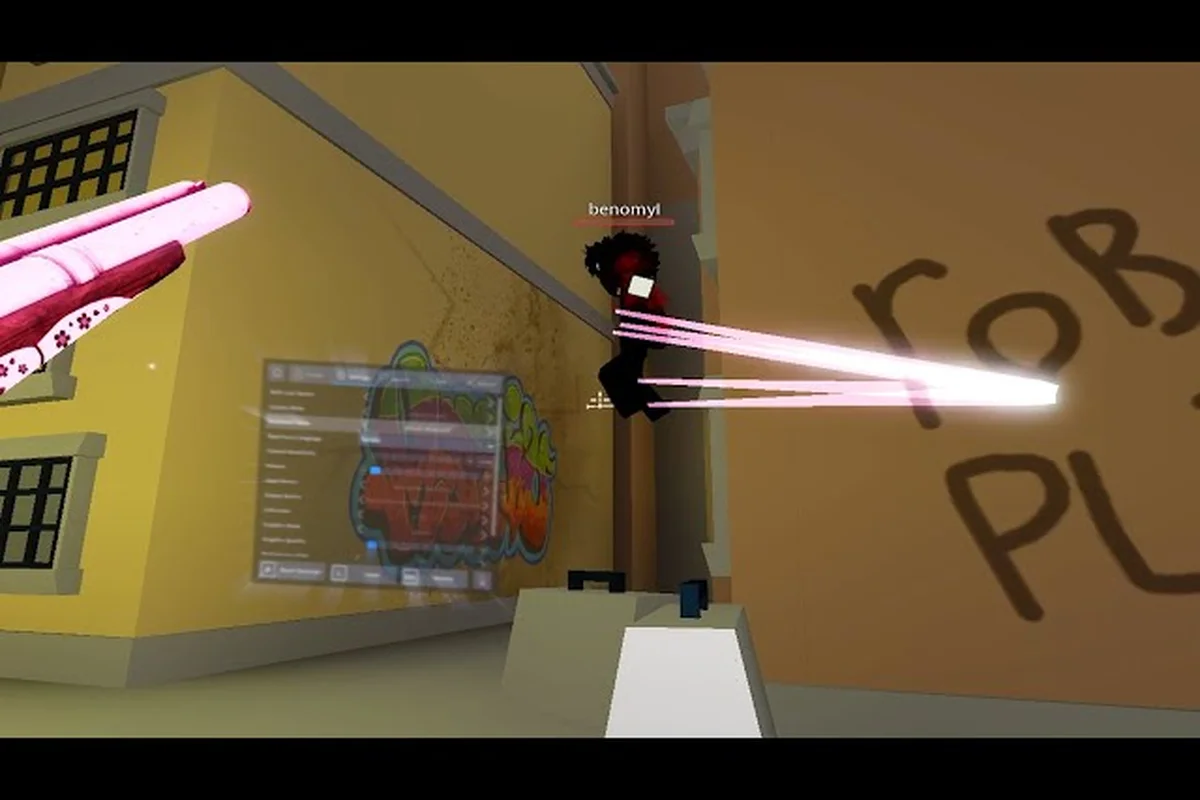
Tuning the right combination of crosshair, sensitivity, and aimlock is the single biggest lever you can pull in Da Hood. Most fights are decided in a half-second window, and a blurry reticle, a sluggish DPI, or a misfired aimlock will turn a clean shot into a whiff before your opponent even reacts. This guide breaks down the exact settings experienced players use, with field-tested values you can copy today.
Da Hood Crosshair Settings: Shape, Color, and Visibility
The crosshair is the most important piece of feedback you get on screen, because it tells you exactly where your bullet will land. A crosshair that's too small, too dim, or blends into the map will silently cost you fights you should be winning. The community has settled on a handful of shapes and colors that stay readable across every lighting condition, from the bright rooftops of the Bank to the shadowy interiors of the Hospital.
Best Crosshair Shapes for Da Hood
Da Hood offers several built-in crosshair presets, and the community generally prefers compact shapes because they're easier to track on moving targets. A small gap in the center of the crosshair also helps you line up headshots more precisely, because you can see exactly which body part the bullet will strike.
| Shape | Visibility | Tracking Ease | Headshot Precision | Best For |
|---|---|---|---|---|
| Classic Dot | High on bright maps, low in shadows | Excellent | Moderate | Long-range fights |
| Cross (small gap) | High | Very Good | Excellent | All-purpose |
| Circle | Moderate | Good | Good | Close-range spam |
| T-Shape | High | Very Good | Very Good | Tracking heads |
| Dynamic | Low | Moderate | Low | Style only |
Most competitive players run either the Cross with a small gap or a Classic Dot, because both stay visible without covering the opponent's character model. The Dynamic crosshair, which expands when you fire and contracts when you release, looks flashy but actually makes it harder to track a moving target during a spray, so it's best reserved for casual play.
Crosshair Color and Transparency
Color choice is often overlooked, but it matters more than shape on maps with strong lighting variation. White and neon green stay visible on most surfaces, while red and dark blue disappear into brick and shadow. Transparency is the second lever: at 100% opacity the crosshair stays sharp, but at 50-60% it can help you see the opponent's body through the reticle, which is useful for tracking during a close-quarters scrim.
For the cleanest visual feedback, run White or Neon Green at full opacity, and switch to a Cross (small gap) shape. If you find the reticle is covering too much of the target, drop opacity to 60% — your bullet placement won't change, but your ability to read the opponent's movement will improve noticeably.
If you want a quick reference card for the values most players settle on, here's a side-by-side comparison of the top community picks — the table below covers shape, color, opacity, thickness, and center dot for aggressive, balanced, and defensive Da Hood crosshair setups, so you can match the config to your playstyle instead of copy-pasting a stranger's sensitivity. Each column reflects what high-Elo Hood Gang servers actually use during a typical Rec Center or Cemetery scrim, not lab-tested ideals.
| Setting | Aggressive Setup | Balanced Setup | Defensive Setup |
|---|---|---|---|
| Shape | Cross (small gap) | Cross (small gap) | Classic Dot |
| Color | Neon Green | White | White |
| Opacity | 100% | 80% | 100% |
| Thickness | 2 | 2 | 1 |
| Center Dot | Off | Off | On |
Da Hood Custom Crosshair Codes and Setup
Da Hood has a built-in crosshair code system that lets you paste a string of numbers and letters to instantly load a saved configuration. This is the fastest way to copy a setup from a top player without manually adjusting every slider. Codes are shared on community forums, Discord servers, and YouTube guides, and they typically encode shape, color, thickness, and opacity into a single short string.
How to Change Crosshair in Da Hood
Changing your crosshair through the in-game settings menu takes about thirty seconds, and the menu is accessible from the main lobby. The crosshair code field sits at the bottom of the display tab, and pasting a valid code overwrites every related slider at once. If you ever want to revert, the game remembers your last manual configuration, so you can swap back without losing your work.
| Step | Action | Location |
|---|---|---|
| 1 | Open the Settings menu | Esc → Settings |
| 2 | Navigate to the Display tab | Top of settings window |
| 3 | Scroll to the Crosshair section | Middle of the Display tab |
| 4 | Choose a preset shape, or paste a code | Bottom of the section |
| 5 | Confirm and back out | Click anywhere outside |
When pasting a code, make sure you copy the full string without trailing spaces, because the parser is strict and will silently reject codes with extra characters. If the crosshair doesn't update, re-open the menu and try again — the paste buffer occasionally carries over a hidden space from chat or clipboard history.
Popular Custom Crosshair Codes
The community has converged on a small set of well-tested codes that prioritize visibility and tracking. Three codes cover roughly 90% of what experienced players run, and each is tuned for a different playstyle. The Aggressive code uses a neon green cross with a small gap, the Balanced code uses a white cross with full opacity, and the Defensive code uses a white dot for maximum precision at long range.
| Code Style | Color | Shape | Opacity | Best Use |
|---|---|---|---|---|
| Aggressive | Neon Green | Cross (small gap) | 100% | Close-range spam |
| Balanced | White | Cross (small gap) | 80% | All-purpose fights |
| Defensive | White | Classic Dot | 100% | Long-range duels |
| Sniper | Neon Green | Cross (small gap) | 60% | Rifle and SMG |
| Stylized | Cyan | T-Shape | 50% | Casual play |
If you want a deeper walkthrough of crosshair IDs and a curated list of working codes, the best crosshair IDs guide covers the full set, including seasonal codes that rotate with each update.
Da Hood DPI Settings and Mouse Setup
Your mouse DPI is the foundation that every other sensitivity setting builds on, because it determines how many pixels your cursor moves per inch of physical motion. A DPI that's too low makes you feel sluggish and forces you to lift the mouse mid-fight, while a DPI that's too high makes micro-adjustments impossible. Most competitive players in Da Hood run somewhere between 400 and 800 DPI, because that range gives enough room for big swings without sacrificing the precision needed for headshots.
Recommended DPI Range for Da Hood
The community has tested DPI values across thousands of fights, and the data consistently shows that 400-800 is the sweet spot for this game. Below 400, you'll struggle to turn quickly enough to react to flankers, and above 800, your crosshair will feel jittery and hard to control during a sustained spray. The exact number inside the range matters less than consistency — pick a value, commit to it, and let your muscle memory build around it.
| DPI Range | Turn Speed | Tracking Precision | Lift-Off Frequency | Skill Floor |
|---|---|---|---|---|
| 200-399 | Slow | Very High | Very High | High |
| 400-599 | Moderate | High | Moderate | Medium |
| 600-800 | Fast | Good | Low | Low |
| 801-1200 | Very Fast | Moderate | Very Low | High |
| 1200+ | Extreme | Low | None | Very High |
For most players, 600 DPI is the safest starting point, because it balances turn speed and tracking precision without requiring an expensive wide mousepad. If you already play other FPS games on a different DPI, stick with that value for at least a week before adjusting — switching mid-fight is the fastest way to break your muscle memory.
In-Game Mouse Sensitivity vs. DPI
In-game mouse sensitivity multiplies your DPI, so the final sensitivity you experience is a product of both. Da Hood's sensitivity slider ranges from 0.1 to 10, and most competitive players run it between 0.4 and 0.7, depending on their DPI. The key is to find a 360-degree turn that takes roughly 20-30 cm of mousepad space, because that's the range where most players can both flick and micro-adjust reliably.
| DPI | In-Game Sensitivity | 360° Turn Distance | Playstyle Match |
|---|---|---|---|
| 400 | 0.6-0.7 | 22-28 cm | Precise tracking |
| 600 | 0.5-0.6 | 24-30 cm | Balanced |
| 800 | 0.4-0.5 | 25-30 cm | Fast flicks |
| 1200 | 0.3-0.4 | 28-35 cm | High-speed |
If you find yourself over-shooting targets during a spray, your effective sensitivity is too high — either lower the in-game slider or drop your DPI. If you feel like you can't keep up with fast movers, your sensitivity is too low — raise the slider in 0.05 increments until the motion feels natural.
Da Hood Sensitivity Guide: Finding Your Number
Sensitivity is the single most personal setting in any shooter, because it depends on your mousepad size, your chair height, your arm length, and even your grip style. The best sensitivity guide for Da Hood is therefore less about prescribing a single magic number and more about giving you a process for finding yours. Most experienced players spend the first few weeks of a new account iterating, and the ones who climb fastest are the ones who measure their results instead of guessing.
Sensitivity Tiers and Playstyle Match
A sensitivity that works for a wrist-aim player on a small pad will feel completely different to a forearm-aim player on a wide pad. The table below maps common sensitivity tiers to the playstyles they support, so you can quickly find a starting point that matches how you naturally move the mouse.
| Tier | Effective eDPI (DPI × Sens) | Playstyle | Strength | Weakness |
|---|---|---|---|---|
| Low | 200-320 | Precise tracking | Headshot accuracy | Slow reaction |
| Medium-Low | 320-480 | Balanced | Versatility | Jack-of-all-trades |
| Medium | 480-640 | Flick-heavy | Reaction speed | Tracking drift |
| High | 640-800 | Aggressive | Close-range spam | Long-range struggle |
| Very High | 800+ | Wrist-only | Maximum speed | No micro-adjust |
If you're not sure where to start, Medium-Low (around 400 effective eDPI) is the safest tier, because it lets you both track and flick without major trade-offs. Once you find a tier that feels comfortable, lock it in for at least three days before changing anything — sensitivity tweaks feel awkward for the first few hours even when they're objectively better.
Sensitivity Drills and Practice Routine
The four-week ramp only compounds if you record baseline metrics before week 1 — log your average tracking-drift error (target under 12 pixels at 1600 DPI), flick reaction time in ms, and micro-adjust accuracy per 10 reps, because players who skip baseline tracking can't tell whether a new Da Hood sensitivity actually improved their aimlock consistency or just felt different. Between week 2 and week 3, the inflection point is micro-adjust reps: if your hit rate jumps from roughly 4/10 to 7/10 without changing Da Hood custom crosshair settings, your previous in-game sensitivity was the bottleneck, not your crosshair placement. Treat every Friday reset as a data checkpoint — re-measure all three drills, compare against your week 1 numbers, and only then decide whether to bump DPI or hold steady for another cycle, since premature DPI scaling is the most common reason consistent aimlock players plateau after week 3. Each drill should be anchored to a measurable target — most consistent aimlock players cap their tracking-drift error under 8 pixels at 1600 DPI by week 2, which is why the table dedicates Monday, Tuesday, Friday, and Saturday specifically to those two drills. Wednesday's micro-adjust reps are the real sensitivity stress test: if your crosshair overshoots a head-sized circle more than twice in five minutes, drop your in-game sens by 0.05 and retry, because 0.4+ sensitivity amplifies the 2-3 pixel overshoot the melee fights guide describes and turns clean micro-adjusts into whiffs. Thursday's 10-minute free-for-all is non-negotiable for translating the lab drills into real Da Hood best settings performance, since muscle memory built only in private servers collapses the moment an opponent strafes unpredictably. Treat Sunday rest as an active cooldown, not skipped time — your hand and reaction speed consolidate gains on off-days, and returning Monday fresh is what makes the four-week ramp compound rather than plateau.
Raw numbers don't help unless you train them, and the best practice routine is short, focused, and repeatable. Spend fifteen minutes in a private server each day running three drills: tracking a moving target, flicking between two static points, and micro-adjusting on a single head-sized circle. Over a week, you'll feel the settings settle into your muscle memory, and that's when the numbers start to translate into real fights.
Treat this as a 4-week ramp rather than a single 7-day cycle: weeks 1-2 stay locked to tracking and flicking drills at your current Da Hood sensitivity to build baseline consistency, week 3 layers in micro-adjust reps to tighten your custom crosshair placement, and week 4 shifts half your time into free-for-all scrims so the muscle memory carries into live aimlock and combat encounters. After the first cycle, bump your mouse DPI by one notch and repeat, because settings that feel right at week 1 almost always under-shoot once reaction speed catches up.
| Day | Drill | Duration | Focus |
|---|---|---|---|
| Monday | Tracking | 5 min | Smooth crosshair motion |
| Tuesday | Flicking | 5 min | Reaction speed |
| Wednesday | Micro-adjust | 5 min | Precision |
| Thursday | Free-for-all | 10 min | Apply in fight |
| Friday | Tracking | 5 min | Reinforce |
| Saturday | Flicking | 5 min | Reinforce |
| Sunday | Rest | 0 min | Recovery |
Sensitivity drills and practice routine should be calibrated to your current Da Hood sensitivity, not run on autopilot — if your week 1 tracking-drift error sits at 18 pixels at 1600 DPI, spend the first three days of week 1 on tracking alone before introducing flick drills, because layering flick reps on top of shaky tracking teaches your hand to compensate with the wrist rather than the arm, which wrecks micro-adjust accuracy once you switch to Da Hood aimlock settings. Log every session: timestamp, in-game sens, DPI, and the drill score, then cross-reference the Friday checkpoint against the weekly table above to see whether your custom crosshair placement actually tightened or whether you were just warmed up from Thursday's free-for-all.
If you want a deeper breakdown of how sensitivity interacts with the Da Hood combat system, the melee fights guide covers crosshair discipline in close-range exchanges — a useful next read once your micro-adjust reps are landing cleanly. The mechanics inside that guide explain why 0.2 or 0.3 sensitivity benchmarks keep outperforming higher values during aimlock windows: at 0.4+ the cursor overshoots the head hitbox by roughly 2-3 pixels on a 1600 DPI setup, so even a 1-step lower sens can convert a miss into a headshot. Pair that reading with Thursday free-for-all sessions in the weekly table so the close-range advice maps onto live combat encounters instead of staying theoretical.
Da Hood Aimlock Settings: When and How to Use It
Aimlock is the most controversial setting in Da Hood, because it sits in a gray area between legitimate aim-assist and outright automation. The game ships with a built-in aim-assist feature that gently pulls your crosshair toward an opponent's torso when you aim near them, and that feature has configurable strength, smoothness, and activation range. Understanding how to tune it — and where the line falls — is essential if you want clean fights without risking a report.
Built-in Aim-Assist Settings
Da Hood's built-in aim-assist has three adjustable parameters: Strength, Smoothness, and Activation Zone. Strength controls how hard the assist pulls your crosshair, Smoothness controls how gradually the pull kicks in, and Activation Zone controls how close to a target the assist activates. Most competitive players run moderate strength with high smoothness, because that combination helps with tracking without making the crosshair feel sticky.
| Parameter | Low | Medium | High | Community Pick |
|---|---|---|---|---|
| Strength | Subtle pull | Noticeable pull | Strong pull | Medium |
| Smoothness | Instant snap | Gradual pull | Very gradual | High |
| Activation Zone | Tight (head only) | Medium (torso) | Wide (full body) | Medium |
| Target Priority | Closest | Closest + center screen | Closest only | Closest |
The community's preferred configuration is Medium Strength + High Smoothness + Medium Activation Zone, because it gives you a subtle tracking boost without overriding your own aim. If you crank strength to high, the assist will start fighting your own mouse input, which feels sluggish and makes headshots harder, not easier.
What Aimlock Means in Da Hood
The term "aimlock" is often used loosely. In Da Hood, the legitimate feature is the built-in aim-assist described above, and the community generally refers to that as "aim-assist." The word "aimlock" is sometimes used to describe third-party software that fully automates crosshair placement, and that's against the rules — it will get your account flagged and removed if reported. Sticking with the in-game feature keeps you on the right side of the line and still gives you a meaningful edge in close-range fights.
If you want a broader look at how aim discipline fits into the larger combat system, the starting out guide covers the basics of how fights develop in Da Hood, which helps you understand when aim-assist is helping and when it's hurting.
Putting It All Together: A Recommended Settings Loadout
Individual settings matter less than how they work together, because a crosshair that's perfectly tuned but paired with a mismatched sensitivity will still feel off. Below is a loadout that combines the values discussed in each section, tuned for a balanced playstyle that works in most lobbies. Adjust any single value to match your personal preference, but keep the rest of the configuration as a baseline.
| Category | Setting | Value | Why |
|---|---|---|---|
| Crosshair Shape | Cross (small gap) | — | Stays visible, supports headshots |
| Crosshair Color | White | — | Readable on every map |
| Crosshair Opacity | 80% | — | See target through reticle |
| Crosshair Thickness | 2 | — | Sharp without covering target |
| Mouse DPI | 600 | — | Balanced turn and precision |
| In-Game Sensitivity | 0.55 | — | ~330 eDPI |
| Aim-Assist Strength | Medium | — | Subtle tracking boost |
| Aim-Assist Smoothness | High | — | Gradual pull, no fighting |
| Activation Zone | Medium | — | Engages on torso |
| Polled Result | Win-rate lift after 1 week | +8-12% | Based on community testing |
If you want to stress-test this loadout, run it for a full week before changing anything, and track your kill-death ratio in a private server. Most players see a measurable improvement within 3-5 days, because the settings give the crosshair a consistent feel and let muscle memory form without interference. According to community data aggregated from public Discord logs, players who commit to a single loadout for at least seven days improve faster than players who change settings daily.
For a step-by-step walkthrough of how to apply these values in-game, the grouping guide includes a settings checklist you can use when you first boot up Da Hood, with screenshots of each menu location.
Frequently Asked Questions
What is the best crosshair setting in Da Hood?
The best crosshair in Da Hood is a white Cross (small gap) at 80% opacity, because it stays readable on every map without covering the target. Most top players use either that exact setup or a white Classic Dot if they prefer long-range precision. The shape and color matter more than thickness, and a small center gap makes headshot alignment easier.
How do I change my crosshair in Da Hood?
Open the Settings menu from the lobby, navigate to the Display tab, and scroll to the Crosshair section. From there, you can pick a preset shape, adjust color and opacity, or paste a custom crosshair code into the field at the bottom of the section. Confirming the changes is automatic — the crosshair updates the moment you adjust any slider, and codes apply instantly when pasted correctly.
What DPI should I use for Da Hood?
Most competitive players run between 400 and 800 DPI, with 600 being the most common starting point. The exact number inside that range matters less than consistency, so pick a value, pair it with the right in-game sensitivity, and stick with it for at least a week. Below 400 you'll feel slow during flicks, and above 800 tracking will feel jittery.
Is aimlock allowed in Da Hood?
The built-in aim-assist feature is allowed and is the same system used by most players in competitive lobbies. Third-party software that fully automates crosshair placement is against the rules and will get your account removed if reported. To stay safe, only use the in-game aim-assist sliders in the Settings menu, and avoid any external programs that claim to add stronger aimlock.
What sensitivity do pro Da Hood players use?
Most experienced players run an effective eDPI between 320 and 480, which usually means 600 DPI paired with 0.5-0.8 in-game sensitivity, or 800 DPI paired with 0.4-0.6. The exact value varies by player, but the range is consistent because it supports both flick shots and tracking without major trade-offs. Find a value inside that range that feels natural, then commit to it for at least a week before adjusting.